
Also, since the spring is more than 70 years old it really needed to have the bottom surfaces and ends worked on so the springs would slide and not gouge the adjoining leaves. LOTS of work! Should slide REAL nice now!
The front spring before...

The spring leaves AFTER some clean up.

I really hated how the extra support leaves looked (it's a "heavy duty" spring), so I shaped them to resemble the leaves of a stock Model A front spring.


The rear spring leaves after hours of degreasing. Ready for paint strip and surface prep.

Spring leaves a few hours later. Paint and old chrome stripped. LOTS of pitting on the bottom sides, but I guess that will just give the grease a place to sit when put back together, right?? HA!!

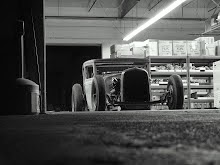
Remember the front spring clamping plate that I had cut because the other one was kind of whimpy? (http://scootermcrad.blogspot.com/2010/01/whatchaworks-does-cad-and-cutting.html)

Here's how it looks after hand filing and smoothing.


4 comments:
Nice, I dread disassembling the rear spring because it's such a pain to get on & off.
Are they getting painted or powdered?
They will be gloss black and painted. Probably PPG Concept acrylic enamel (single stage). I'm also looking at acrylic urethanes though. Leaning towards the enamel though. I'm afraid the urethane will make them look a little too "plastic-like". It's way more durable, but I'm not sure how I'll like the finish.
looking good Scott!I've been following along.
Thanks Rene!! I appreciate it!! Hope you're well!
Post a Comment